+44 (0)1205 722745

Professional Epoxy Ding Repair

Posted on July 21, 2009 - Filed Under Surftech Boards | By

Surftech Tuflite & Wood Veneer surfboards are incredibly strong and light and can withstand 3-4 times more punishment that an average surfboard. Although Surftech boards are tough, they can be damaged. That’s why Surftech offers three ding repair kits:

Here is our guide to using the Professional Epoxy Ding Repair Kit:

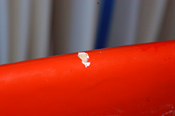
  • Prepare the ding by removing any debris or jagged fiberglass.

    Prepare the ding by removing any debris or jagged fiberglass.

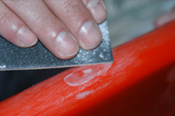
  • Sand down the ding and surrounding area Use Tuflite Ding Dough to fill hole and bring ding back to it's original shape. When dry, sand to even the repair area out if necessary.

    Sand down the ding and surrounding area Use Tuflite Ding Dough to fill hole and bring ding back to it's original shape. When dry, sand to even the repair area out if necessary.

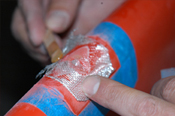
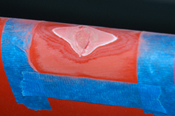
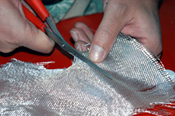
  • Cut fiberglass cloth slightly bigger than the ding. You can use two pieces of fiberglass for areas that need extra strength. Be sure to cover area about 1"-2" around the ding. Tape off area if necessary.

    Cut fiberglass cloth slightly bigger than the ding. You can use two pieces of fiberglass for areas that need extra strength. Be sure to cover area about 1"-2" around the ding. Tape off area if necessary.

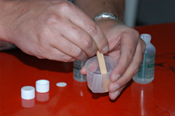
  • Mix Epoxy resin 2 parts of 'Part A' to 1 part of 'Part B' in 2 oz cup provided. Mix thoroughly. Avoid stirring too quick to prevent air bubbles. Mix for roughly 1 minute.

    Mix Epoxy resin 2 parts of 'Part A' to 1 part of 'Part B' in 2 oz cup provided. Mix thoroughly. Avoid stirring too quick to prevent air bubbles. Mix for roughly 1 minute.

  • Apply a thin layer of resin to the repair then add the 1st piece of fiberglass. Slowly saturate the cloth until it becomes clear then add the next layer if necessary. Again, make sure to slowly saturate fiberglass cloth.  Let dry. Should be completely dry in about 2 to 4 hours under normal weather conditions. Set up & cure time may vary due to weather and accuracy of mixing.

    Apply a thin layer of resin to the repair then add the 1st piece of fiberglass. Slowly saturate the cloth until it becomes clear then add the next layer if necessary. Again, make sure to slowly saturate fiberglass cloth. Let dry. Should be completely dry in about 2 to 4 hours under normal weather conditions. Set up & cure time may vary due to weather and accuracy of mixing.

  • Once completely dry, use the sanding pad provided with the 2 grits of sand paper. Use the rough grit to remove any bumps and to shape the repair. Use the fine grit to blend the repair surface to the rest of the board. You can apply another 'hot coat' of epoxy resin to conceal the texture of the fiberglass cloth if necessary.

    Once completely dry, use the sanding pad provided with the 2 grits of sand paper. Use the rough grit to remove any bumps and to shape the repair. Use the fine grit to blend the repair surface to the rest of the board. You can apply another 'hot coat' of epoxy resin to conceal the texture of the fiberglass cloth if necessary.

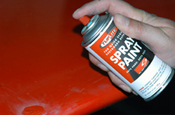
  • Paint using Tuflite Touch Up or Spray Paint. Be sure to shake can thoroughly.

    Paint using Tuflite Touch Up or Spray Paint. Be sure to shake can thoroughly.

It’s always recommended that you wear a dust mask and latex gloves when working with resins and fiberglass. Always do your repairs in a well ventilated area.
Check out our guide to using Ding Dough.

Comments

Trackback URL for this post: http://www.surfcom.co.uk/blogs/2009/07/professional-epoxy-ding-repair/trackback/

Bookmark and Share

Leave a Reply


SEO Powered by Platinum SEO from Techblissonline